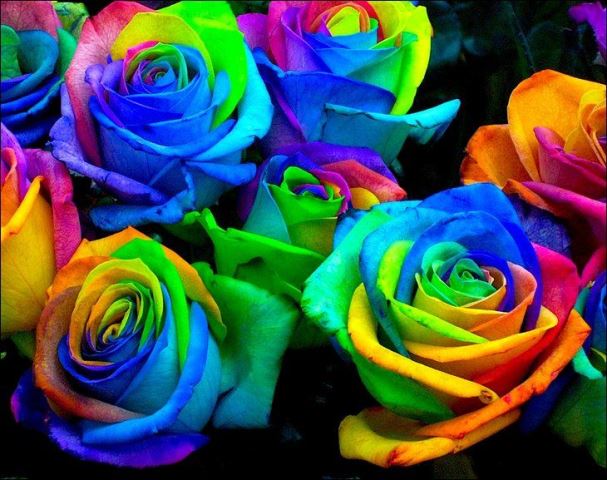
Rainbow Roses Can Be A Perfect Gift: Learn How To Make One!
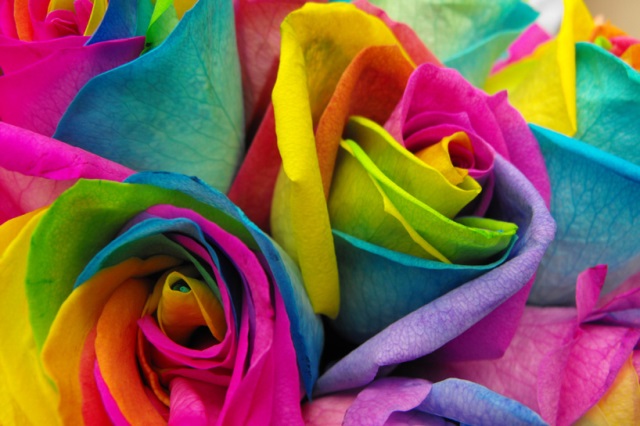
If you think that the rose is the supreme gift you will find these ideas interesting, at least. Most of us thought that these roses are some sort of engineering genetic bred things but happily, this is not the case, you can create your own, in the comfort of your own home. Even though it is not possible to grow rainbow roses in your backyard garden, coloring them with the technique showcased below is still extremely graphic and fitted for a gift.

The process is simple, clear, extraordinary beautiful. Basically you are changing the color by making use of its transportation system. The xylem tubes of the roses stem surges water to maintain itself, therefore sending water and nutrients to the leaves and petals of the flowers. If the stem of a rose would be submerged in a colored water, this color would be transported, pumped up into the flowers as well. The water contained by the petals is eventually evaporated but the color remains there; in this manner, color will beautify the rose. This happens because the outer layer of a white rose petal is transparent and will embrace the color that we feed.
It is important to know that you are using the same technique for both multi colored roses, single colored blue roses, purple or blue roses, or any other mixture. It is also important to know that you will not get petals with different colors entirely. The solution applied in this exercise is composed of a few simple steps: splitting the end part of the rose`s stem and feeding it different colors to color it naturally in a magnificent multicolored rainbow rose.
DIY RAINBOW ROSES – STEP BY STEP PROCESS
1. Choose a white rose.

Start with a white or very lightly colored rose for making a real rainbow rose. For the purest color, a white rose is best.
- If you cannot find a white rose to use, try a peach, pale yellow, or light pink rose. Avoid using red roses or dark pink roses; dark colors will not work because the deep shade prevents the color from showing through.
- Note that the stage the rose is in will affect how fast or slowly the dye takes hold. A rose that is near its blooming stage, or already in its blooming stage, will accept the color more readily. On the other hand, a rose in its bud stage will take much longer.
2. Trim the stem.
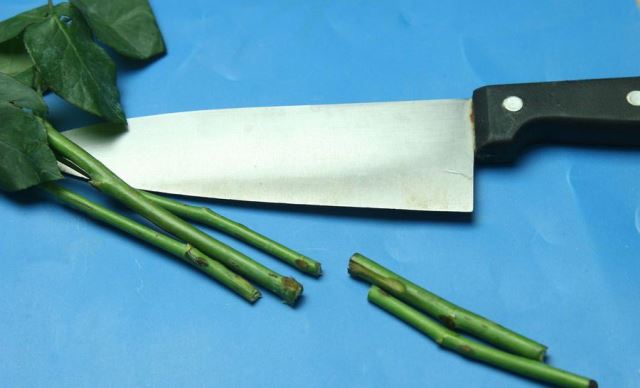
Cut the stem of the rose down so that it is roughly the length you want it to be.
- Use sharp scissors or a sharp knife to cut the bottom of the stem at an angle.
- To determine the proper length, base the stem height on the height of the containers you will be dyeing the rose in or the height of the vase you plan to store the rose in afterward. The stem of the rose needs to be only a little taller than the length of the final vase. It should not be too much taller than the height of the dyeing containers though, or else the rose will become top-heavy and will not sit well inside the containers.
3. Split the stem into sections.
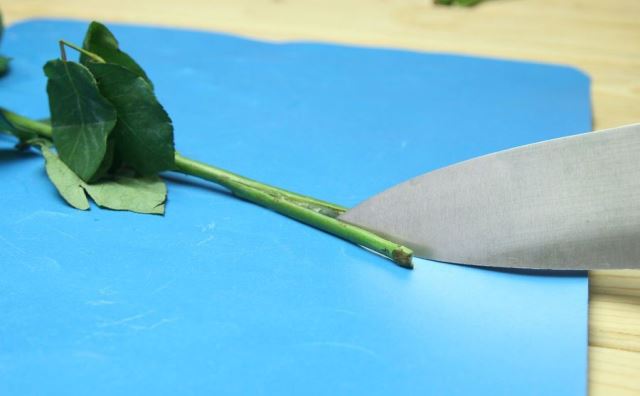
Use a sharp blade to split the end of the stem into multiple sections. You can use either scissors or a knife, but either way, the tool you choose must be sharp. The stem of a rose is fairly woody, and if you use a dull blade, you could end up causing the stem to break or tear the rose.
- The cut should extend from the bottom of the rose up to about 1 inch (2.5 cm) away from the base of the petals.
4. Divide the stem into two to four sections.
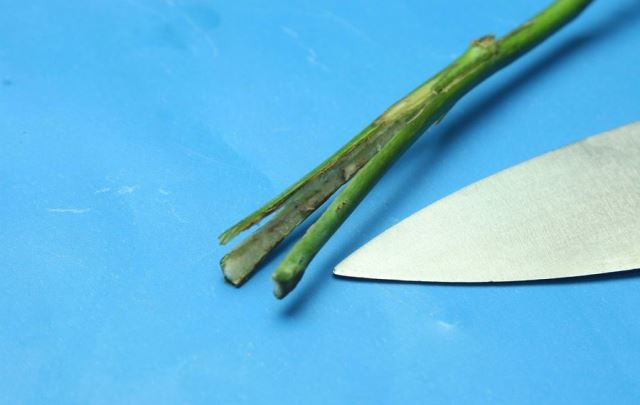
If you cut too many sections into the stem, you risk weakening the stem.
- Note that the number of sections you cut the stem into will determine the number of colors in your rainbow rose.
5. Mix several colors of food coloring into cups of water.
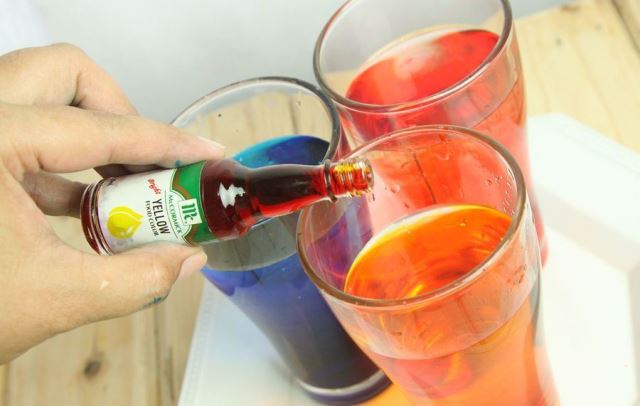
Fill a few tall, narrow containers with water and mix in a few drops of food coloring into each container. Choose one different color for each container.
- As mentioned already, the number of colors should match the number of sections you split the stem into.
- The more food coloring you use, the brighter the colors will be in the resulting rainbow rose.
- The best containers will be narrow and sturdy. Avoid using containers with wide lips since the split sections of stem will need to stretch into each container, and wider lips might be harder to stretch the stem sections into. A popsicle mold works well, as do small votive glasses.
6. Place each stem section into a different container.
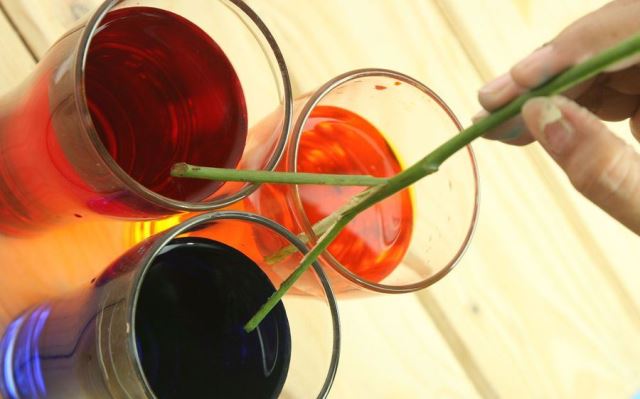
Carefully place each split stem section into a different container of colored water, making sure that the cut ends are fully immersed.
- Exercise extra caution when bending and positioning the stem sections. The split stem is especially weak, and if you move the sections with too much force, you might end up snapping them by accident.
7. Let the roses sit for a few days.
You should notice some color change within the first 30 minutes, but for a vibrant rainbow rose, you will need to let the rose sit in its dye bath for a few days.
- It may take a full week before the colors become notably vibrant, but after a single day, each of the petals should be tinted with color.
- The dyed water will be absorbed through the stem of the rose just like standard water would be taken in. As the dyed water travels throughout the parts of the rose and hydrates the petals, the dye will be deposited in the petals. Since the petals are white, the dye shows through easily.
Comments are closed.